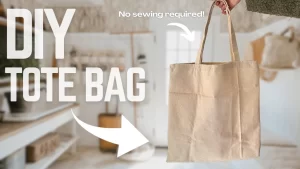
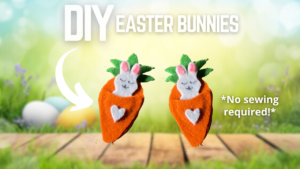
You can make detailed textile art without a needle. Fabric glue lets you layer appliqué shapes, build fabric collages, fix trims and yarn to canvas, and finish edges, all without stitching. The work holds up best when you choose porous fabrics, use thin layers of glue, give each layer time to cure, and save stitching for pieces that will carry weight or be handled often. The tips below show where a glue like Speed-Sew suits art projects, where it doesn’t, and how to plan a piece so it looks deliberate rather than stuck together.
A note on examples: this article describes project types and techniques. It doesn’t describe specific finished artworks or other people’s results, because we haven’t documented any. Treat each idea as a starting point to test on your own scraps.
Planning a no-sew piece
1. Lay out the whole design before you open the glue
Glue rewards planning. Once a piece is pressed down, you can’t lift and shift it the way you can unpick a stitch. One no-sew guide to yarn wall art suggests that you lay out your yarn in waves or patterns on the canvas first so you can see the composition. The same habit works for fabric collage and appliqué. Arrange everything dry and take a phone photo. Then glue one section at a time, working from the background layer forward.
2. Match the glue to the material, not just the project
The Speed-Sew product listing states that it is not recommended for leather, nylon, or non-porous materials. Textile art often mixes media, so this matters. Cotton, linen, denim, felt, wool and most woven fabrics are good candidates. Shiny ribbons, vinyl, plastic sequins, metallic films and nylon net need a different adhesive or a few hand stitches. If you aren’t sure what a scrap is made of, test it before you build it into a piece.
3. Spot-test sheer and pale fabrics
The same listing advises spot-testing sheer or light-coloured fabrics first. In art pieces, a glue mark that shows through organza or a pale cotton can spoil a design you spent hours on. Put a small dab on an offcut of the exact fabric, let it dry fully, and hold it up to the light. If it darkens or stiffens the fabric, use less glue, apply it only at the edges, or back the sheer layer with an opaque one.
Techniques worth exploring
4. Build appliqué in layers, letting each one set
Layered appliqué is where glue saves the most time. Shapes stacked three or four deep would take a long time to stitch by hand. Glue the base shape and press it down. Wait until it is no longer tacky before adding the next layer, so the pieces don’t slide or soak through. Keep the glue a little inside the edge of each shape so none squeezes out. A thin line close to the edge holds better than a heavy blob in the middle.
5. Use glue to control fraying on raw-edge work
Raw, frayed edges are a deliberate look in many collage and landscape-style pieces. Fabric glue lets you decide how far the fray goes. Fray the edge to the length you want, then run a fine line of glue just behind it to stop the threads unravelling further. This works well on cottons and linens. Test first on loosely woven fabrics, which can wick glue further than you expect.
6. Try yarn and cord drawing on canvas or fabric
Yarn wall art is a good beginner project because the line itself becomes the design. Draw a light pencil guide, apply glue in short sections, and press the yarn or cord along the line, working a small area at a time so the glue doesn’t skin over. Thicker wool yarns give bold, graphic lines. Fine embroidery floss or crochet cotton suits detailed outlines. Smooth synthetic cords may not grip well, so test them first.

7. Combine glue with a few stitches where it counts
No-sew doesn’t have to mean no thread at all. Hanging sleeves on wall quilts, loops that hold a piece’s weight, and joins that get handled a lot are better sewn. A few hand stitches at stress points, with glue holding everything else, often gives the cleanest result. Glue is good at keeping things flat and in place. It isn’t the best choice for anything load-bearing.
8. Think about washing before you finish
Most wall art never goes near a washing machine, but wearable art, cushion covers and bags do. The Speed-Sew listing says that once fully cured, allowing 24 hours, the adhesive is designed to withstand regular machine washing. For delicate art pieces, a longer wait and gentle handling make sense. Turn wearable pieces inside out, use a gentle cycle, and check the garment label before using any dryer heat.
Where stitching is still the better choice
Sewing is the better method for some projects:
- Heavy or hanging pieces. Large wall hangings carry their own weight, and glue alone at a hanging point may not be enough.
- High-stress areas on wearable art. This includes straps, seams that bend often, belt loops and pocket openings.
- Very stretchy fabrics. A glued area can feel stiffer than the fabric around it.
- Heirloom or valuable textiles. If a piece must stay reversible or look invisible, stitching or professional conservation is safer.
- Children’s items that get rough play. Repeated pulling and washing put demands on a glued bond.
Quick material guide
| Fabric/material | Best method | Key warning |
|---|---|---|
| Denim/cotton/felt | Glue or sewing | Cure fully before washing |
| Stretch fabric | Flexible glue or sewing | Glued areas may feel stiff |
| Leather/vinyl | Specific adhesive | Speed-Sew is not recommended for these |
| Nylon and shiny synthetics | Test first or stitch | Non-porous surfaces may not bond |
| Sheer or pale fabrics | Test first | Glue may show through |
| Hanging or load points | Sewing | Glue may not be sufficient |
Finishing checklist
- Apply a thin, even layer. Too thick a layer can prevent a proper cure.
- Press firmly for 30 to 60 seconds.
- Remove excess glue before it dries.
- Let the glue cure before handling, framing or washing.
- Wash wearable pieces inside out on a gentle cycle.
- Test on a scrap if you’re unsure about a fabric.
On safety, Health Canada regulates consumer products under the Canada Consumer Product Safety Act. A “non-toxic” claim on a label is the manufacturer’s own statement, not a Health Canada approval. Check the product label for safety guidance, especially if children are helping with the craft or the piece is for a child.
If you want a low-risk first project, try a small yarn or felt collage on a stretched canvas. It shows you how the glue behaves on different materials before you commit to a larger piece.
This article is for general information only and does not constitute legal, technical, or professional advice. Always consult a qualified professional for guidance specific to your situation.
Frequently asked questions
Can I use Speed-Sew on nylon or vinyl in an art piece?
The product listing says it is not recommended for leather, nylon or non-porous materials. Use a suitable adhesive for those materials or add a few stitches.
Will glue show through sheer fabric?
It can. Spot-test sheer and pale fabrics on an offcut first, let the test dry, and check it against the light. If it shows, use less glue or back the sheer layer with an opaque fabric.
Can I wash wearable textile art made with glue?
The listing states the adhesive is designed to withstand machine washing once fully cured, allowing 24 hours. Wash pieces inside out on a gentle cycle and check the label before using dryer heat.
Last updated: 30 October 2026