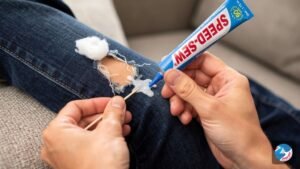
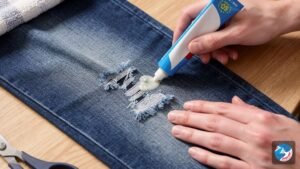
Yes, prepping fabric before gluing usually makes a real difference. Washable fabrics can shrink the first time they are washed, and many new fabrics carry starch or finishing treatments on the surface. If you glue first and wash later, the fabric can shrink around a bond that does not shrink with it, and the glue may have gripped a coating rather than the fibres themselves. The result can be puckering, a stiff ridge, or a seam that lifts after a few washes. The fix is simple: wash the fabric the way you plan to care for the finished item, dry it, press it flat, and make sure the area you are gluing is clean and dry. The tips below explain when this matters most, when to skip washing, and how to prep different materials.
Why prep matters for a glued bond
Fabric glue bonds best when it can soak slightly into clean fibres and cure without the fabric moving underneath it. Two things work against that on new or unprepared fabric. The first is shrinkage: cotton fabrics often shrink around 5%, and shrinkage of up to 10% is not uncommon in natural-fibre fabrics. A thin line of cured glue does not shrink at the same rate, so the fabric around it can draw up and wrinkle. The second is surface finish. Many fabrics are given starch treatments at the end of manufacturing, which add crispness, and excess dye can also remain in new fabric, as this pre-washing guide from Kokka explains. Those finishes sit between the glue and the fibres.
- Pre-wash both fabric layers the way you will care for the finished item so shrinkage happens before gluing.
- Skip washing for items that will never be washed; use steam to pre-shrink wool instead.
- Press flat, let fabric dry and cool fully, and test on a scrap before gluing.
None of this means every glued project fails without a pre-wash. A small craft that will never be washed is a very different case from a pair of jeans going into the machine every week. The more often an item will be laundered, the more prep pays off.
Quick tips for prepping fabric before gluing
1. Pre-wash the way you will wash the finished item
A useful rule from sewing guides is to prewash fabric the same way you plan to care for the finished project. If the item will go through a warm wash and a tumble dry, do that now so the shrinkage happens before the glue goes on, not after. If it will only ever be hand-washed, hand-wash it.
2. Pre-wash both pieces, not just one
When you glue a patch, trim, or lining to a base fabric, both layers need the same treatment. A cotton patch that shrinks on a pre-shrunk shirt will pull at its edges just as badly as the reverse. If one piece is already well-washed, such as an old pair of jeans, wash the new piece before applying it.
3. Skip the detergent extras
Fabric softener and dryer sheets are designed to leave a coating on fibres, which is the opposite of what you want under glue. For the prep wash, use plain detergent and skip softener. This is general advice rather than a product-specific rule, so check your glue’s label for any additional preparation guidance.
4. Do not pre-wash items that will never be washed
Some projects are better left alone. One sewing guide notes that items that won’t be machine washed or dry cleaned, such as woollen jackets, should not be pre-washed. The same logic applies to wall hangings, decorative felt pieces, or costume items you will spot-clean only: washing them adds risk without adding benefit.
5. Use steam for fabrics you cannot wash
For wool and other fabrics that should not go in water, the same source suggests that steam can be used to pre-shrink them instead. Hold a steam iron just above the fabric or use a press cloth, let it cool flat, and check the care label first. Steam will not remove starch the way a wash does, so treat this as a way to reduce shrinkage, not a full clean.
6. Press flat before you glue
Wrinkles and folds get locked in once glue cures. After washing and drying, iron the area so both layers lie flat and line up properly. Let the fabric cool completely before applying glue, because applying adhesive to warm fabric can change how it spreads and sets. On delicate synthetics, use a low setting or a press cloth, since heat from an iron can melt or mark them.
7. Make sure the fabric is completely dry
Damp fabric can dilute glue and slow curing. If you have just washed or steamed something, give it time to dry fully, including thick seams and hems that hold moisture longer than the open fabric.
8. Clean the repair spot on worn garments
For repairs on clothing you already own, the problem is usually not factory finishes but body oils, deodorant residue, food, or dirt around the tear. Wash the garment first so the glue has a clean surface. If you are repairing a frayed edge, trim loose threads so the glue holds the fabric rather than a tangle of fibres.
9. Test on a scrap or hidden area
If you are unsure how a fabric will react, glue a small test piece from a seam allowance, an inside hem, or a leftover scrap. Let it cure, then wash it the way you plan to wash the finished item. This tells you more about how the bond will hold up than any general rule can.
Fabric-by-fabric prep guide
| Fabric/material | Prep before gluing | Key warning |
|---|---|---|
| Denim/cotton | Pre-wash and dry as you will in use | Natural fibres can shrink noticeably; cure fully before washing |
| Stretch fabric | Wash, dry, and glue while relaxed, not stretched | Use a flexible glue; tape may feel stiff |
| Wool and dry-clean-only items | Do not wash; steam to pre-shrink if needed | Check the care label before applying any heat or moisture |
| Leather/vinyl | Wipe clean; do not machine wash | Needs a suitable adhesive; iron-on tape can damage the surface |
| Delicate synthetics | Gentle wash; press on low heat only | Test first; heat from an iron can melt or mark |
| High-stress seams | Prep alone will not fix this | Sewing is the better choice; glue may not be sufficient |
When prep is not enough and sewing is the better choice
Good preparation helps glue perform at its best, but it does not turn glue into the right tool for every job. Sewing is usually the better choice for high-stress seams such as crotch seams and backpack straps, belt loops, pocket openings and seam junctions, large holes where fabric is missing, children’s rough-play clothing, and stretch denim that needs maximum flexibility. It is also worth considering a tailor for expensive garments where an invisible repair matters.
After gluing: care checklist
- Apply a thin, even layer; too thick prevents a proper cure.
- Press firmly for 30 to 60 seconds.
- Remove any excess before it dries.
- Let the bond cure 24 to 72 hours before washing, or as the label directs.
- Wash inside-out on a gentle cycle.
- Avoid high dryer heat; check the garment label.
- Test on a scrap of fabric first if you are unsure.
Check the product label for safety guidance, especially for children’s clothing or when children are helping with the craft. If your next project is something that will be washed regularly, start with one prep wash before you open the glue.
This article is for general information only and does not constitute legal, technical, or professional advice. Always consult a qualified professional for guidance specific to your situation.
Do I need to pre-wash fabric for a craft that will never be washed?
Usually not. Items that will not be machine washed or dry cleaned, such as decorative pieces or woollen jackets, are better left unwashed, since washing adds risk without benefit.
Should I use fabric softener when pre-washing before gluing?
It is better to skip it. Softeners and dryer sheets leave a coating on fibres, which can sit between the glue and the fabric. Use plain detergent and check your glue label for any extra guidance.
How long should I wait after gluing before washing the item?
Let the bond cure 24 to 72 hours, or as the product label directs, then wash inside-out on a gentle cycle and avoid high dryer heat.
- Tips on how and why to pre wash fabric — Cotton often shrinks around 5%; up to 10% not uncommon in natural fibres
- The Ultimate Guide to Pre-washing Fabric — Starch treatments and excess dye on new fabric
Last updated: 3 November 2026