You’re pulling on your favourite pair of black yoga pants, the ones that are perfectly soft and comfortable, when your fingernail catches on something. You look down and there it is: a tiny, frustrating hole right on the thigh. It’s not from wear and tear, just a random snag. They’re too good to throw out, but the hole is just big enough to make you self-conscious. You’ve heard about fabric glue, but your mind immediately goes to a stiff, crunchy patch on your super-stretchy leggings. Will it even work?
The honest answer is yes, you absolutely can repair stretchy leggings with fabric glue—but only if you use the right kind of glue and the right technique. A stiff, craft-store glue or a fray-sealing liquid will create a hard spot that will crack and peel away the first time you stretch the fabric. The key is flexibility.
For stretchy fabrics like leggings, always patch from the inside with a similar scrap of material. Applying glue directly to the hole’s edges on the outside will create a stiff, visible spot that will likely crack when the fabric stretches.
Why a Flexible Bond is for Stretchy Fabric
Fabrics like spandex, lycra, and elastane blends are engineered to stretch and recover their shape. Any repair you make must be able to do the same. When you apply a standard, rigid adhesive to a material that needs to move, you create a point of failure. The fabric will stretch around the hard glue spot, putting immense stress on the bond until it breaks.
This is why a specialized, flexible fabric adhesive is essential. A product like Speed-Sew is formulated to create a bond that remains pliable after it cures. It moves *with* the fabric, rather than fighting against it. This ensures the repair holds up through squats, lunges, or just curling up on the couch.

How to Properly Fix a Hole in Leggings (The Patch Method)
Simply dabbing glue onto the hole from the outside won’t work. It will look messy and won’t be strong enough. The professional approach is to patch the hole from the inside. It’s simple, effective, and creates a nearly invisible repair.
What You’ll Need:
- Your leggings with the hole
- A flexible fabric glue (like Speed-Sew)
- A small scrap of similar stretchy fabric (an old t-shirt, the hem of another pair of leggings, or a patch kit piece)
- A piece of plastic wrap or wax paper
- A pair of scissors
Step-by-Step Instructions:
- Prepare Your Workspace: Turn the leggings inside out. Smooth out the area around the hole.
- Protect the Fabric: Slide the piece of plastic wrap or wax paper inside the leg of the pants, directly underneath the hole. This is a crucial step to prevent gluing the front and back of the leggings together.
- Cut Your Patch: Take your scrap fabric and cut a small patch that is slightly larger than the hole itself. Round the corners of the patch with your scissors—this helps prevent the edges from catching and peeling up over time.
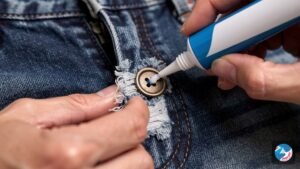
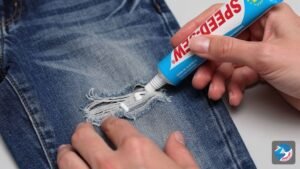
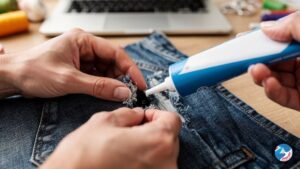
- Apply the Adhesive: Squeeze a thin, even layer of Speed-Sew onto the fabric patch. Don’t apply it directly to the leggings. Spreading it on the patch gives you more control and prevents excess glue from seeping through the hole to the visible side.
- Place the Patch: Carefully position the glue-side-down patch over the hole on the inside of the leggings. Ensure it’s flat and covers the entire damaged area.
- Press and Cure: Press down firmly on the patch for about 30-60 seconds. If any tiny bits of glue have squeezed through to the outside, wipe them away immediately with a damp cloth. Now, the most important part: let it cure. Leave the leggings flat and undisturbed for at least 24 hours (up to 72 for maximum bond strength) before wearing or washing.
Aftercare and Washing Checklist
To ensure your repair lasts, follow these simple care instructions:
- Apply a thin, even layer: Too much glue can feel stiff and prevent a proper cure.
- Press firmly: Good initial contact is key to a strong bond.
- Remove excess glue before it dries: Once cured, it’s much harder to remove.
- Cure for 24-72 hours: Do not rush this step. The bond needs time to fully set.
- Wash inside-out on a gentle cycle: This protects the repair from agitation.
- Avoid high heat in the dryer: High heat can degrade both the adhesive and the elastane in the fabric. Air drying is best.
- Test first: If you’re unsure, always test the glue on a hidden area or a scrap piece of the same fabric.
When Fabric Glue Isn’t the Right Answer
Fabric glue is a fantastic tool, but it’s not a miracle worker. There are situations where it’s not the best solution for leggings:
- High-Stress Seams: If the hole is right on the crotch seam, waistband, or any other major structural seam, the constant tension is too much for an adhesive bond. This is a job for a needle and thread.
- Large Holes: If the hole is larger than a coin and fabric is actually missing, a simple patch won’t be strong enough to bridge the gap.
- Expensive Garments: For high-end athletic or fashion leggings where a perfectly invisible repair is critical, you may want to consult a professional tailor.
- General Fabric Degradation: If the fabric is thinning out, pilling excessively, or losing its stretch all over, patching one hole is only a temporary fix before another one appears.
Fabric-Specific Repair Warnings
| Fabric/Material | Best Method | Key Warning |
|---|---|---|
| Denim/Cotton | Glue or Sewing | Cure fully before washing to ensure bond strength. |
| Stretch Fabric (Spandex/Lycra) | Flexible Glue | Stiff adhesives or iron-on tape will crack and peel. |
| Leather/Vinyl | Specific Adhesive | Iron-on tape can melt or permanently damage the surface. |
| Delicate Synthetics (e.g., chiffon) | Test First | Heat from an iron can melt or mark the fabric; some glues may show through. |
| High-Stress Seams | Sewing | Glue alone may not provide sufficient strength for load-bearing areas. |
Keeping Your Leggings Hole-Free
A little prevention goes a long way in extending the life of your favourite stretchy pants.
- Wash with Care: Always turn leggings inside out and consider using a mesh laundry bag to protect them from zippers, hooks, and rough fabrics in the same load.
- Mind the Heat: Avoid high-heat dryer cycles. The heat breaks down the delicate elastane fibres that give leggings their stretch.
- Watch for Snags: Be mindful of sharp jewellery, pet claws, and rough surfaces like concrete benches or wicker chairs.
That small hole doesn’t have to be the end of your most comfortable pair of leggings. With the right flexible glue and the proper interior patching technique, you can get them back into your wardrobe rotation in no time. If you have any questions about your specific repair project, don’t hesitate to reach out to us at Speed-Sew. We’re always happy to help.