You’re rushing to get out the door for a meeting, you pull on your favourite fall coat, and you hear that dreaded *pop*. The main button, the one that holds everything together, is now sitting in your hand. There’s absolutely no time to hunt for a needle, the right colour of thread, and remember how to make a knot that actually holds. It’s a frustratingly common moment, but it doesn’t have to derail your morning. You don’t need to be a seamstress to fix it; you just need the right tool and technique.
Why Do Buttons Come Loose in the First Place?
Buttons rarely fail without warning. It’s usually a slow process of wear and tear. The threads holding the button get abraded with every use, stressed in the washing machine, and snagged on bags or seatbelts. Over time, those threads fray and weaken until one final tug is all it takes for the button to break free. On high-use items like coats or the waistband of your jeans, this process is even faster. While sewing is the traditional fix, a high-quality fabric adhesive offers a surprisingly durable and fast alternative when done correctly.
For a coat button, place a toothpick across the buttonholes before pressing it into the glue. Once the glue is tacky, remove the toothpick. This creates a small gap, or ‘shank,’ allowing the thick coat fabric to sit comfortably behind the button without straining the bond.
The No-Sew Fix: Using Fabric Glue for Buttons
Can fabric glue really hold a button? Absolutely. Modern fabric glues are designed to create a strong, flexible bond that can withstand the rigours of daily wear and even machine washing. The key is not just to dab some glue on and hope for the best. The technique matters, especially for thicker garments like coats.
Your Step-by-Step Guide to Gluing a Button
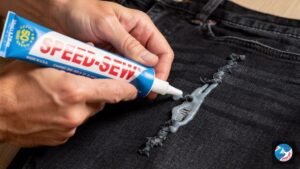
Follow these steps for a repair that lasts. For this, you’ll need your garment, the button, a good quality fabric glue like Speed-Sew, a toothpick, and a damp cloth.

- Prepare the Surface: Start by preparing the fabric. If there are any loose threads from the old button, trim them off neatly with a pair of scissors. Make sure the area is clean and dry. If there’s any residue, gently wipe it with a damp cloth and let it dry completely.
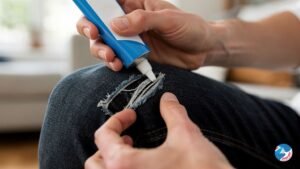
- Apply the Glue: This is the most important step. Do NOT apply glue to the button itself. Squeeze a small, controlled dot of fabric glue directly onto the fabric where the centre of the button will sit. You want enough to create a solid base, but not so much that it will ooze out from the edges. A dot about the size of a lentil is usually perfect.
- Position the Button: Carefully place the button onto the dot of glue. Press down firmly for 30-60 seconds to ensure the glue makes good contact with both the fabric and the underside of the button.
- The Pro Trick for Coat Buttons (Creating a Shank): For thicker fabrics like a wool coat or a denim jacket, you need a little space for the fabric to sit behind the button when fastened. This space is called a ‘shank’. To create one without sewing, place a toothpick or a large pin across the top of the button *after* you’ve pressed it into the glue. Gently lift the button slightly so it’s resting on the toothpick. This creates the perfect gap. Let the glue set for about an hour before carefully sliding the toothpick out.
- Clean Up and Cure: If any glue did squeeze out, wipe it away immediately with a damp cloth before it starts to dry. Now for the hardest part: patience. Your button will feel secure after an hour or two, but the glue needs to cure fully to reach maximum strength. Allow the garment to sit undisturbed for at least 24 to 72 hours before wearing or washing. Check the instructions on your specific adhesive for exact times.
When Sewing Is Still the Better Option
Fabric glue is a fantastic tool, but it’s not the solution for every situation. For certain high-stress or delicate applications, a needle and thread provide a more reliable and appropriate repair.
- Waistband Buttons on Tight Jeans: The button on the waistband of snug-fitting jeans is under constant, high tension. Sewing provides the necessary strength to handle this strain day in and day out.
- Very Heavy or Ornate Buttons: A large, heavy metal button on a winter coat might be too much weight for glue alone, especially with the constant movement.
- Delicate & Sheer Fabrics: On materials like silk, chiffon, or lace, fabric glue can sometimes seep through and leave a visible mark. A fine needle and thread will give a more invisible repair.
- Heirloom or Designer Garments: For irreplaceable or very expensive clothing, a professional sewn repair is always the safest choice to preserve the garment’s value and integrity.
Fabric-Specific Warnings
Different materials react differently to adhesives and heat. Always consider the fabric type before starting a no-sew repair.
| Fabric/Material | Best Method | Key Warning |
|---|---|---|
| Denim/Cotton | Glue or Sewing | Cure fully before washing to ensure a strong bond. |
| Stretch Fabric | Flexible Glue | A non-flexible glue can create a stiff spot that may crack. |
| Leather/Vinyl | Specific Adhesive | Standard fabric glue may not bond well; an iron can melt the surface. |
| Delicate Synthetics | Test First | Glue may show through; test on an inconspicuous area. |
| High-Stress Seams | Sewing | Glue may not be sufficient for areas like belt loops or pocket corners. |
When Not to Use Fabric Glue
Beyond buttons, it’s important to know the general limits of fabric adhesives. Avoid using them for:
- High-stress structural seams like the crotch of trousers or backpack straps.
- Large holes where fabric is missing and a patch is required.
- Expensive garments where an invisible, professional repair is critical.
- Clothing for children who are very rough during play, as the repairs may not withstand extreme stress.
- Belt loops, pocket openings, and other junctions that are pulled constantly.
Care for Your No-Sew Repair
To make your glued button last as long as possible, follow these simple care steps.
- Apply a thin, even layer of glue — too much prevents a proper cure.
- Press the button firmly into the glue for 30-60 seconds.
- Remove any excess glue with a damp cloth before it dries.
- Allow the glue to cure for a full 24-72 hours before washing.
- When you do wash the garment, turn it inside-out and use a gentle cycle.
- Avoid high heat in the dryer, which can weaken the adhesive over time. Air drying is best.
- If you’re ever unsure, test the glue on a hidden scrap of fabric first.
Check the product label for safety guidance, especially for children’s clothing or when children are helping with the craft.
That loose button doesn’t have to be a wardrobe emergency. With a tube of quality fabric glue and the right technique, you can create a fast, durable repair and get on with your day. If you have questions about using Speed-Sew for your clothing repairs, feel free to get in touch with our team.
Is fabric glue strong enough for buttons?
Yes, a high-quality permanent fabric glue is strong enough for most buttons on shirts, blouses, and coats. The key is to use the correct application technique—applying glue to the fabric, not the button—and allowing it to cure fully for 24-72 hours before wearing or washing.
How long does fabric glue take to dry on a button?
Fabric glue will typically feel tacky or set within an hour, but it is not fully cured. For a strong, permanent, and washable bond, you must let the glue cure for at least 24 hours, and up to 72 hours for maximum strength, before subjecting the button to any stress or laundering.
Can you wash clothes after gluing on a button?
Yes, provided you use a permanent, washable fabric glue like Speed-Sew. After the glue has fully cured (24-72 hours), the bond is designed to withstand machine washing. For best results, turn the garment inside-out and use a gentle cycle with cool water.
Does fabric glue work on jean buttons?
Fabric glue can work for decorative buttons on denim, but it is not recommended for the main waistband button (tack button). Those metal buttons are installed with a special tool and are under immense tension, which requires a mechanical attachment rather than an adhesive one.
Last updated: 24 July 2026