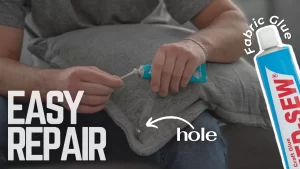
Clean edges and a strong fabric glue bond depend on four things. The fabric has to be clean, dry and trimmed. The glue goes on as a thin, even layer placed just inside the edge rather than on it. You press the layers firmly together and wipe away any squeeze-out while it is still wet. Then you leave the repair alone until it has fully cured before it is stretched, worn hard or washed. Too much glue causes most messy results. It is also behind many weak ones, which surprises people. This guide covers each stage in practical detail, says where fabric glue works well, and says where a needle and thread is the better choice.
Why a thin layer gives a better result than a thick one
It seems logical that more glue means a stronger hold. With fabric, it usually works the other way. Fabric glue needs to soak slightly into the fibres of both surfaces and then set. A thick bead sits on top of the weave instead. It takes longer to set all the way through, and it leaves a hard, plasticky ridge that cracks or peels when the fabric flexes.
- A thin, evenly spread layer bonds better than a thick bead, which can cause stiffness, slower drying and bleed-through.
- Applying glue just inside the fold edge keeps squeeze-out hidden; remove any excess before it dries.
- Use sewing instead of glue for high-stress seams, large holes, rough-play clothing and garments that need an invisible repair.
Overapplication has several known effects. Using too much can cause stiffness, longer drying times and bleed-through. Each one shows up in a different way:
- Stiffness turns a soft hem or a flexible patch edge into something that feels like cardboard and holds its fold awkwardly.
- Longer drying leaves the centre of a thick bead soft long after the surface feels dry. That makes it easy to handle the repair too early.
- Bleed-through leaves dark or shiny patches on the right side of the fabric. These show most on thin cottons, light colours and anything with a sheen.
The goal is enough glue to wet both surfaces across the bonding area, and no more. When you press the layers together, a tiny amount should spread toward the edge without oozing past it.
Prepare the fabric before you open the glue
Preparation takes a few minutes. It also decides how well the glue grips.
Clean and dry both surfaces
Oils from skin, fabric softener, dust and lint all interfere with adhesion. On a garment you have been wearing, the area around a fallen hem or a loose patch often carries body oils and softener residue. Washing the item first and letting it dry completely gives the glue a better surface to grip. Skip the fabric softener on that wash.
Handle the bonding area as little as possible once it is clean. A lint roller or a strip of tape pressed over the area picks up loose fluff, which matters most on fleece, flannel and anything that sheds.
Trim loose threads and frayed edges
Loose threads hold the layers apart and leave small gaps in the bond. They can also poke out of a glued edge and spoil the finish. Trimming loose threads or frayed edges before gluing helps give a neat and secure result. Use sharp scissors and cut close, but do not cut into the weave itself.
The same source suggests lightly roughening a shiny or slippery surface with fine sandpaper or an emery board to give the glue more to grip. Treat that with care. It can scuff, dull or damage some fabrics. Try it on a hidden spot or a scrap first, and skip it on delicate or expensive pieces.
Press the fold before you glue it
For hems, turned edges and appliqué edges, press the fold into place with an iron first, at a temperature the garment label allows. A crisp fold stays put while you work. You won’t need to hold it open with one hand while you glue with the other, which is how smears happen. Let the fabric cool before applying glue.
Set up your workspace to prevent mess
A few household items make clean application much easier:
- Wax paper or parchment paper. Slide a sheet inside the garment, between the front and back layers. If any glue soaks through, it will not bond the two sides of a trouser leg or shirt together.
- A toothpick, cotton swab or small craft spatula. Use these to spread glue thinly and to lift away excess.
- A slightly damp cloth. Keep it within reach for wiping squeeze-out and fingers.
- Clips or pins. Binder clips, wonder clips or pins placed away from the glue line hold layers in position while the glue sets.
- A flat, weighted object. A heavy book on top of a sheet of wax paper keeps even pressure on a patch or hem.
- A scrap of similar fabric. You will use it for a test.
Work on a flat, hard surface. A soft surface such as a bed or a couch cushion lets the fabric shift and makes even pressure difficult.
How to apply fabric glue step by step
Order matters here, because the glue starts setting as soon as it is exposed to air.
- Test on a scrap or hidden area. Apply a small amount to a matching scrap or an inside seam allowance. Once it has dried, check for bleed-through, discolouration and stiffness. This step tells you how much glue the fabric can take.
- Mark your glue line. On a hem or turned edge, the glue belongs slightly inside the fold. Applying glue just inside the edge of the fold rather than right at the raw edge keeps squeeze-out hidden. When you press the layers together, the glue spreads outward, and starting a little inward means it stops short of the visible edge.
- Apply a thin bead or a row of small dots. On medium and heavy fabrics, a thin continuous line works well. On lighter fabrics, small dots placed close together spread into a bond with less risk of soaking through.
- Spread it out. Use a toothpick or spatula to thin the bead into an even film across the bonding area. A thin layer covering the whole contact area is stronger than a thick line down the middle.
- Bring the layers together carefully. Lower the top layer straight down instead of sliding it into place, which drags glue toward the edge.
- Press firmly for 30 to 60 seconds. Use your fingertips or the side of your hand along the full length of the bond. Pressure pushes the glue into both surfaces.
- Remove excess immediately. Lift any squeeze-out with a toothpick or the corner of a damp cloth. Wipe away from the fabric edge, not along it, so you do not spread glue across the surface.
- Hold it in place while it sets. Clip the edge or lay wax paper and a weight over it. Follow the product label for setting and cure times, and do not stretch, wear or wash the item until it has fully cured.
Getting clean results on different kinds of projects
The basic method stays the same, but each project has its own weak points.
Hems
Work in short sections of about a hand’s length, especially on long trouser or skirt hems. If you run a bead around the whole circumference first, the start may already be setting by the time you press the end. Keep the glue line toward the upper part of the turned hem allowance, away from the fold at the bottom. That way the finished hem stays soft where it bends.
Patches
Patches fail at the edges first, because that is where they catch and get lifted. Spread glue across the whole back of the patch, not just a ring around the outside, and bring it close to the edge without reaching it. Press from the centre outward to push out air and send any excess toward the edge, where you can wipe it away. Keep the weight on top while the glue sets. For a patch on a knee or elbow, consider stitching around the edge as well. Glue alone may not hold up to constant bending.
Appliqué, trims and ribbon
Decorative pieces are where visible glue looks worst. Use dots instead of lines, and keep them slightly inside the outline of the appliqué. For ribbon and trim, a thin line down the centre usually holds better than two lines near the edges, and it can’t squeeze out at the sides. Seal cut ends of ribbon with a tiny dab on the underside only.
Seam repairs
For a small split along a straight, low-stress seam, turn the garment inside out. Line up the seam allowances, and glue them to each other along the original stitching line. Glue on the inside cannot be seen from the outside, which is the cleanest result available. Read the section on when not to use glue before trying this on anything that takes real strain.
Fraying edges
To stop a raw edge fraying, use the least glue of any project. Run a very fine line just along the edge and work it into the threads with a fingertip or swab. You want to bind the threads, not coat them. A heavy layer leaves a hard, shiny rim.
Delicate, sheer and slippery fabrics
Thin and fine fabrics show every mistake. For silk, lace and sheer fabrics, the advice is to always test on a hidden area or scrap first and to use micro-dots instead of lines. Lace has open areas where glue has nothing to grip and will show. Place dots on the solid parts of the design, not across the gaps.
Satin, lining fabrics and some synthetics have smooth surfaces that the glue has trouble keying into. They can also mark easily. If you press these fabrics with an iron, use a pressing cloth and a low setting, because heat can melt or mark some synthetics. If the garment is valuable or the repair has to be invisible, a tailor or a careful hand-sewn repair is usually the safer route.
Fabric and method at a glance
| Fabric/material | Best method | Key warning |
|---|---|---|
| Denim/cotton | Glue or sewing | Cure fully before washing |
| Stretch fabric | Flexible glue | Tape may feel stiff |
| Leather/vinyl | Specific adhesive | Iron-on tape can damage surface |
| Delicate synthetics | Test first | Heat from iron can melt or mark |
| High-stress seams | Sewing | Glue may not be sufficient |
What makes the bond strong
Once the glue is on, its strength depends on a few factors you control.
Contact area. A bond that is wider and covers the full overlap spreads the load over more fibres. A narrow line takes all the strain in one place. Where you can, give the glue a generous overlap, such as a deeper hem allowance or a patch that extends well past the damage.
Even pressure. Pressure in the first minute presses the glue into both layers. Gaps where the fabric wasn’t pressed tend to be where peeling starts.
Undisturbed setting. Pulling, trying on or folding the item before the glue has cured can weaken the bond in ways you won’t notice until later. Leave it flat and follow the label.
Matching glue to the job. Fabric glues differ in flexibility, wash resistance and the materials they are made for. A glue designed for clothing behaves differently from a general craft glue. Check that the label lists the fabric you are working with and the kind of use the item will get.
When not to use fabric glue
Fabric glue is a good fix for many repairs. In some situations sewing, or a professional repair, will last longer or look better:
- High-stress seams. The crotch seam of trousers, backpack straps and any load-bearing area face more strain than a glued bond is likely to handle over time.
- Large holes where fabric is missing. Glue joins fabric to fabric. It cannot fill a gap. A patch, with stitching if the area flexes, is the better approach.
- Expensive garments where invisible repair is critical. Glue can stiffen or mark fabric in ways that can’t easily be undone. Hand stitching or a tailor is safer.
- Children’s rough-play clothing. Knees and seams on play clothes take repeated hard stress and frequent washing. Stitching tends to hold up better.
- Stretch denim that needs maximum flexibility. A glued area is less stretchy than the fabric around it and may pull or crack where the denim needs to move.
- Belt loops, pocket openings and seam junctions. These points concentrate force, and glued bonds there tend to give way first.
For some of these, glue and stitching together work well. For example, you can glue a patch in place so it doesn’t shift, then add a few stitches around the edge for strength.
Care checklist after a glued repair
- Apply a thin, even layer. Too thick prevents a proper cure.
- Press firmly for 30 to 60 seconds.
- Remove any excess before it dries.
- Cure for 24 to 72 hours before washing, or longer if the product label says so.
- Wash inside out on a gentle cycle.
- Avoid high heat in the dryer, and check the garment label.
- Test on a scrap piece of fabric first if you are unsure.
A note on safety
Check the product label for safety guidance, especially for children’s clothing or when children are helping with the craft. In Canada, consumer products fall under the Canada Consumer Product Safety Act, administered by Health Canada. A “non-toxic” statement on a glue label is the manufacturer’s declaration, not a Health Canada approval of that brand. Work in a ventilated space if the label recommends it, and keep glue away from eyes and mouths.
A sensible next step
Before your next repair, glue two scraps of the same fabric together using the thin-layer, inside-the-edge method. Let them cure according to the label, then flex and gently pull them. You’ll see how much glue that fabric needs, whether it bleeds through and how stiff the bond feels. Then you can work on the real garment knowing what to expect.
Should I use a line of glue or dots?
On medium and heavy fabrics, a thin continuous line that you then spread into an even film works well. On lighter, sheer or delicate fabrics such as silk and lace, small dots placed close together reduce the risk of bleed-through. On lace, place them on the solid parts of the design rather than across the gaps.
How do I stop glue from showing on the outside of a hem?
Apply the glue just inside the edge of the fold rather than at the raw edge, so any squeeze-out stays hidden. Use a thin layer, lower the fabric straight down instead of sliding it, and lift any excess with a toothpick or damp cloth before it dries. Slipping wax paper inside the garment stops glue that soaks through from bonding the front and back layers together.
Is glue strong enough for a ripped crotch seam or backpack strap?
Usually not. High-stress seams such as the crotch, backpack straps and other load-bearing areas, along with belt loops, pocket openings and seam junctions, are better repaired by sewing. Glue may not be sufficient there, though it can hold a piece in place before you stitch it.
Last updated: 1 November 2026